

Work Item Labels
Labels are colored tags you assign to work items to categorize and differentiate them within a project. They are ideal for tracking components, features, or other classifications that don't fit the standard work item properties like state, priority, or assignee.
Once labels exist, you can apply several to a single work item, then filter, group, and sort your work items by them across every layout.
A label belongs to one project, so each project keeps its own set.
Manage labels
Labels are managed in a project's settings, and the two actions have different permission levels:
- Managing the label set (create, edit, delete, reorder, and group labels) requires Project Admin access. Contributors, commenters, and guests can see labels but cannot change the set.
- Applying an existing label to a work item is part of editing that work item, so anyone who can edit a work item can add or remove its labels, even if they cannot manage the label set.
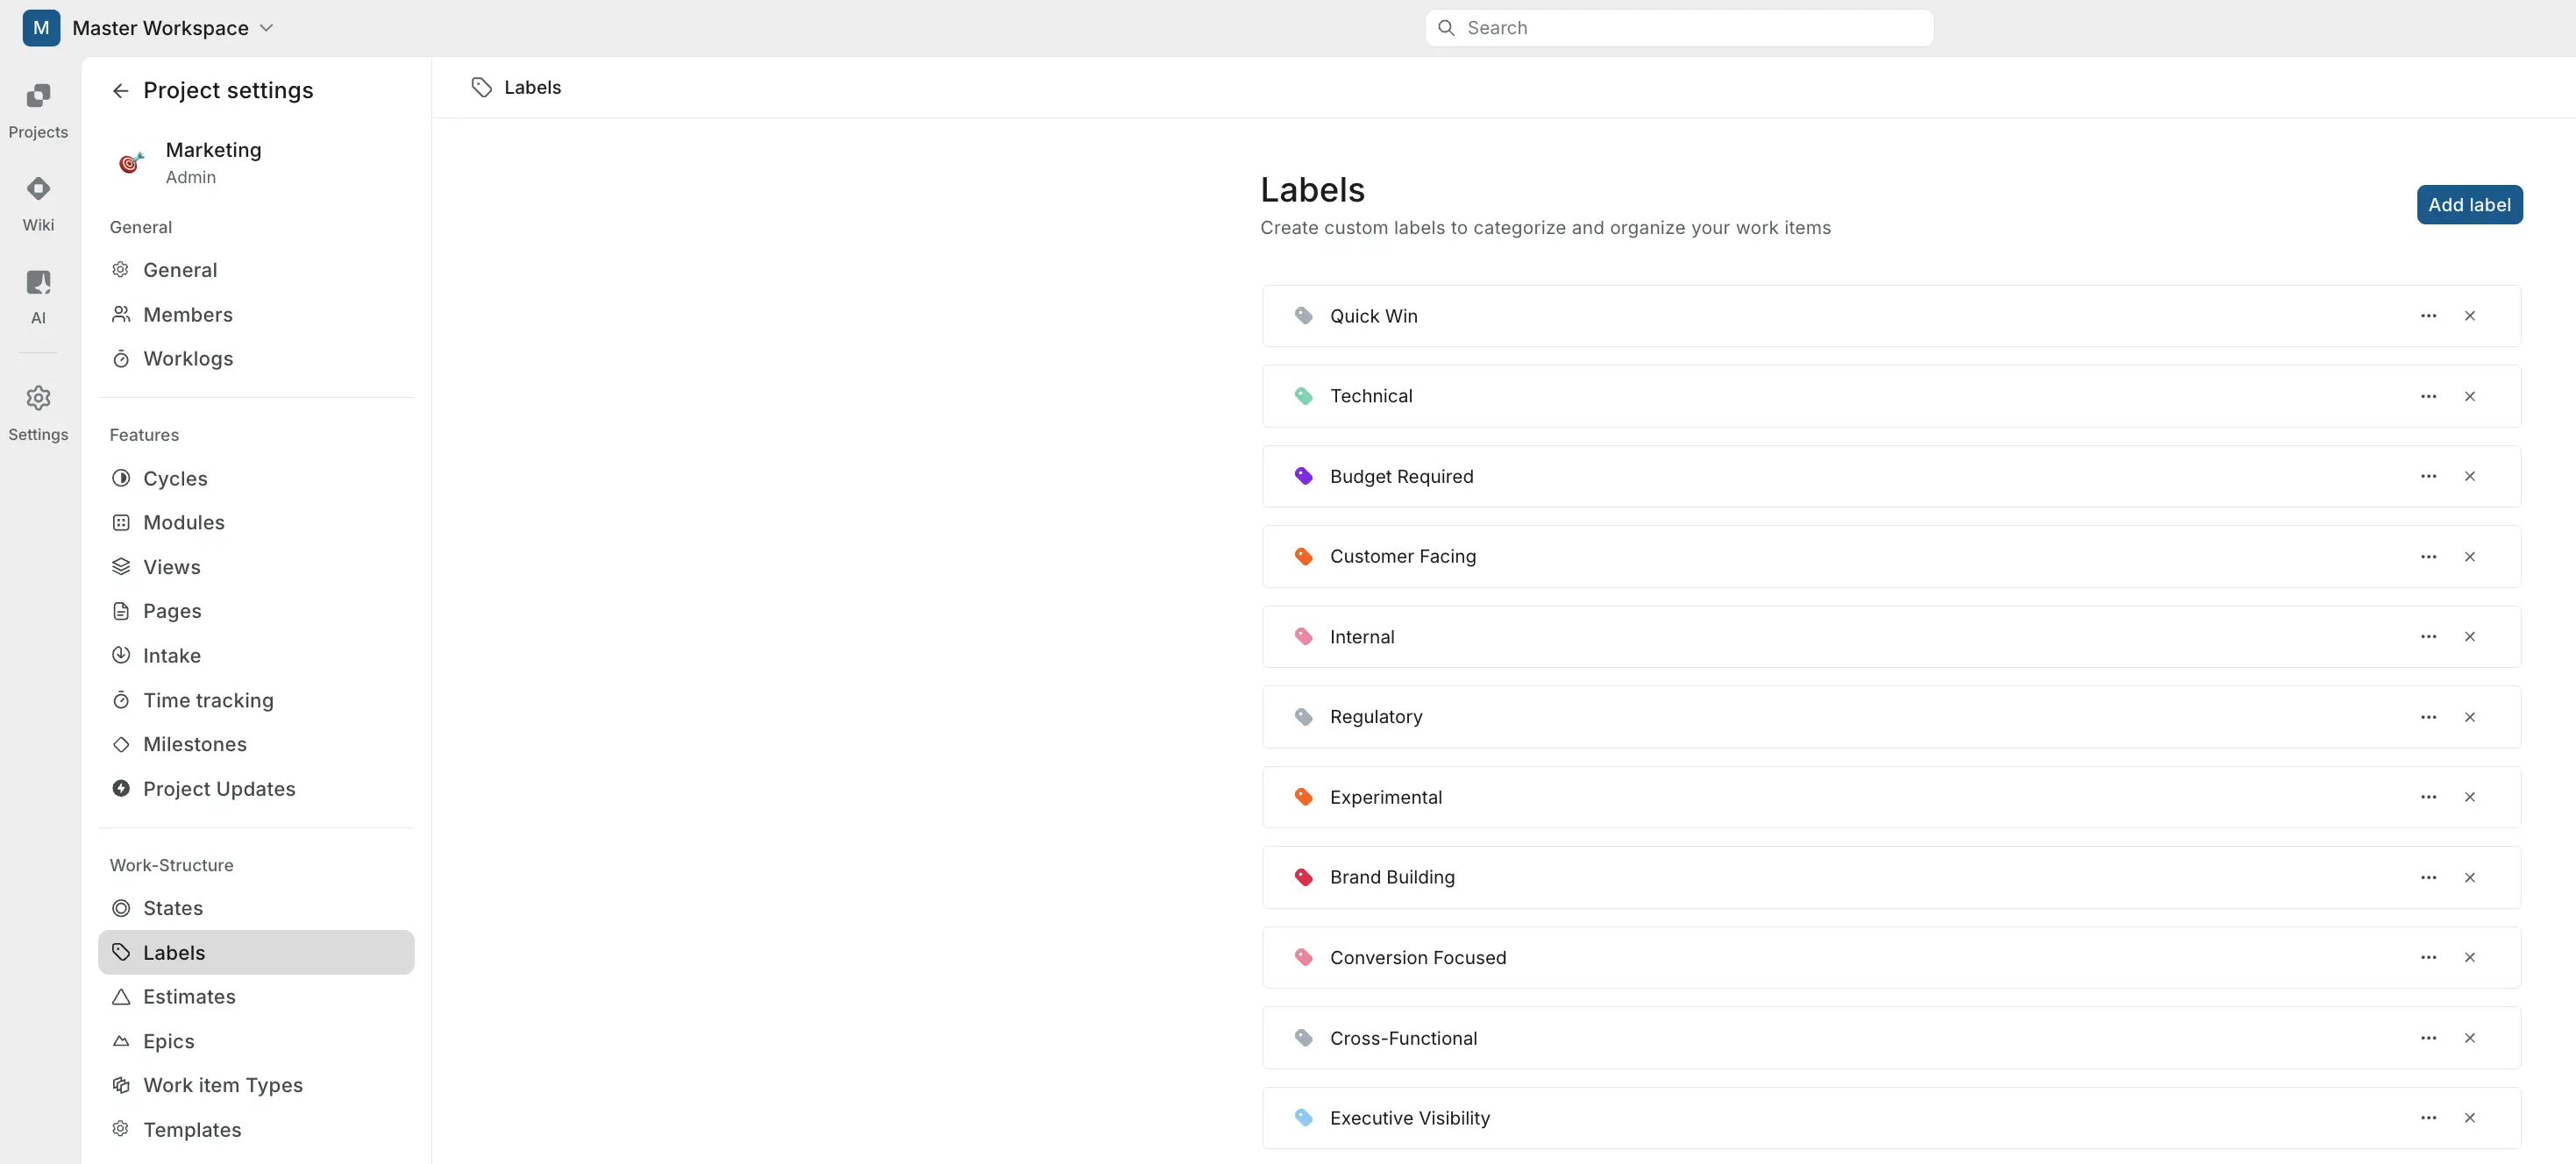
You can manage your labels in the Labels tab in your project settings. From here, you can create, edit, and delete labels.
Open Project settings → Labels to create, edit, group, reorder, and delete your project's labels. If the project has none yet, you'll see a prompt to create your first one.
Create a label
- Click Add label.
- Enter a name and pick a color. Plane pre-selects a random color from a preset palette; you can choose a different one.
- Click Add.
A few rules to know:
- The name is required and can be up to 255 characters.
- Names must be unique within the project (case-insensitive). If you reuse a name, Plane tells you the label already exists.
- In the app, a label has a name and a color only. The color picker offers a fixed palette of preset colors.
You can also create a label on the fly while working, without opening settings. From a work item's label picker, type a new name and create it inline. Newly created labels there are given a color from the palette automatically.
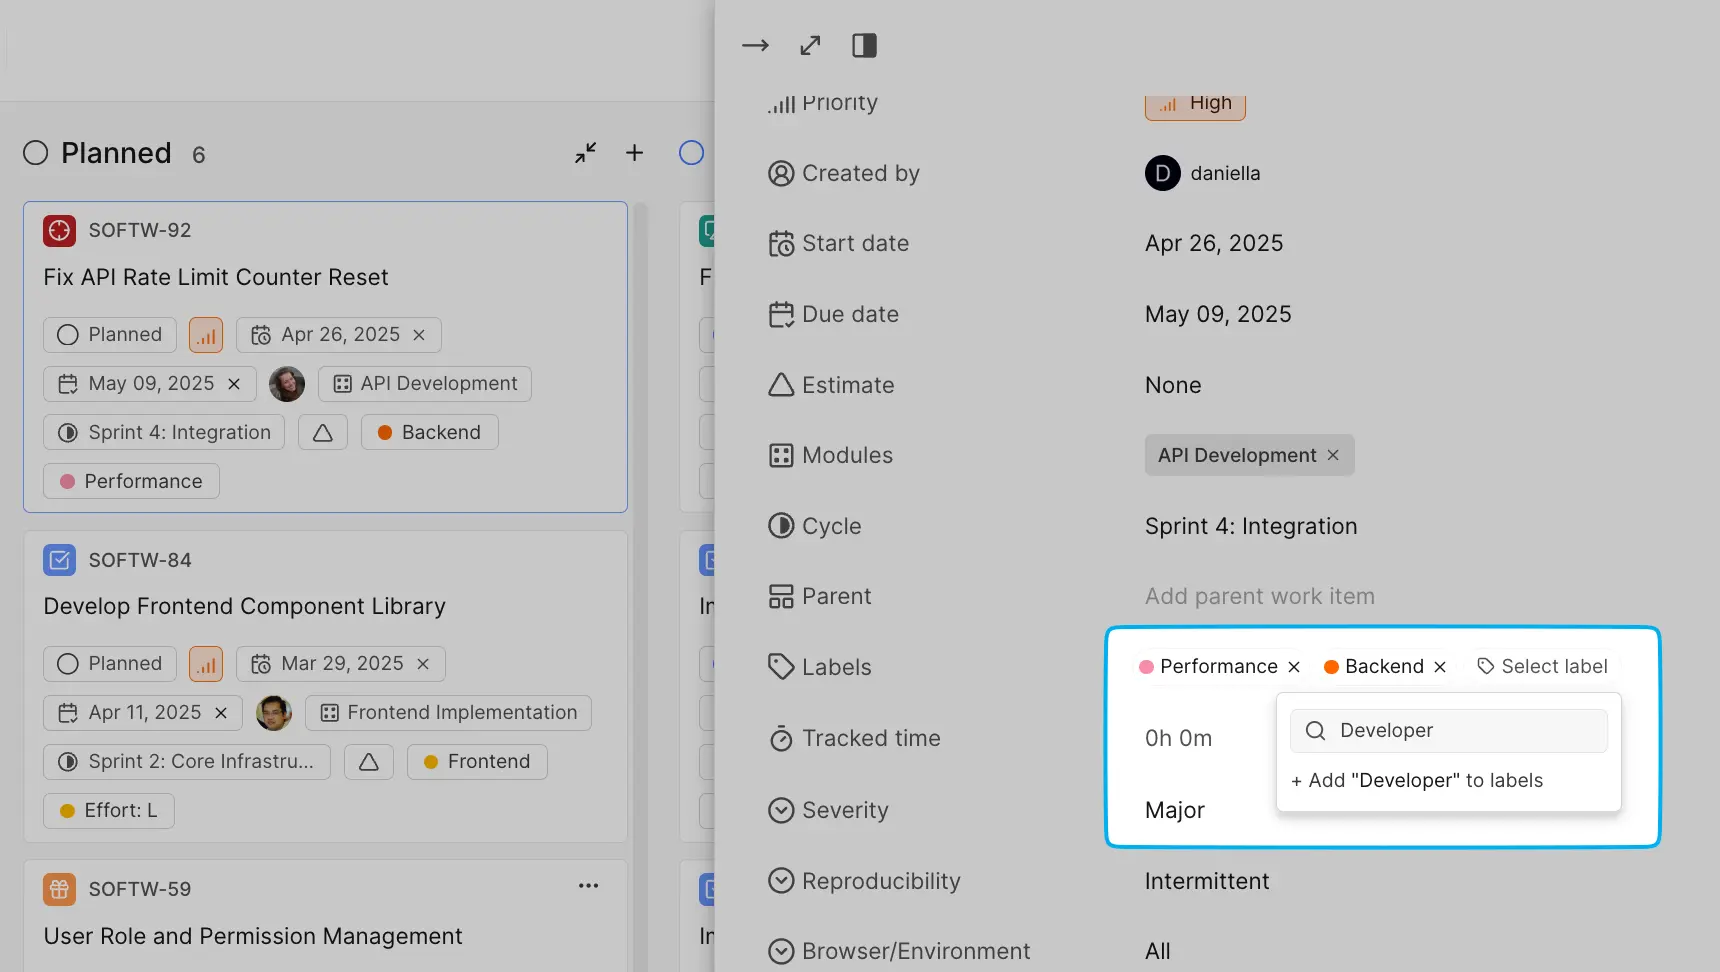
When you create a work item, Plane can also suggest labels based on its title and description, so you can apply relevant labels (or create suggested ones) in a click.
Edit a label
- Open the label's menu and choose Edit label.
- Update the name or color.
- Click Update.
Editing is inline, the same form used to create a label, so you can change the name and color but nothing else.
Group labels
You can nest related labels under a parent to keep a long list organized, for example grouping "Frontend," "Backend," and "Infra" under a parent called "Area."
- To create a group, drag one label onto another in the Labels list. The dragged label becomes a child of the one you drop it on, and the parent becomes a collapsible group.
- Grouping is done entirely by drag-and-drop. There is no separate "create group" button and no parent field in the create form.
- Nesting is one level deep. A label can be a parent or a child, but you cannot nest groups inside other groups.
- A group shows as a collapsible section with its child labels indented underneath.
Reorder labels
Drag labels up or down in the list to set their order. The order you set is the order labels appear in pickers and filters. Reordering, like grouping, requires Project Admin access.
Delete a label
- Open the label's menu and choose to delete it.
- Confirm in the dialog.
When you delete a label, Plane removes it from every work item that had it and from any views that were filtering on it. The work items themselves are not affected beyond losing that one label.
Deleting a group deletes its children
Deleting a parent label also deletes all of the labels nested under it, and removes those labels from their work items too. If you want to keep the child labels, drag them out of the group first.
Apply labels to work items
Labels are applied from wherever you edit a work item, and a work item can carry as many labels as you need.
- From a work item: open it and use the label field to add or remove labels. You can create a new label inline from the same picker.
- From the create dialog: set labels while creating the work item, or accept Plane's label suggestions.
- In bulk: select multiple work items in the List layout, and apply labels to all of them at once.
Where labels help you across the project
Once your work items are labeled, labels power several parts of the product:
- Filtering. Filter any work item list by one or more labels, in every layout.
- Grouping. Group work items by label in the board, list, and spreadsheet layouts. On the board you can drag a work item from one label group to another to relabel it.
- Sorting. Order a list by label name.
- Display. Show labels directly on cards and as a spreadsheet column.
- Queries (PQL). Filter with the
labelfield (for examplelabel IN (Bug, Regression)) and thehasNoLabel()function to find unlabeled work. See Plane Query Language. - Automations. Use labels as a condition (only act on work items with certain labels) and as an action (add, remove, or replace labels when a rule fires). See Automations.
- Views and workspace views. Labels are available as a filter in saved project views and in workspace-level views that span projects.
- Templates. Project templates can carry a predefined set of labels so new projects start with your standard taxonomy.
Import labels from a CSV Pro
Instead of adding labels one at a time, you can bulk-create them from a CSV file. This is useful when setting up a new project or migrating a label taxonomy from another tool.
- In Project settings → Labels, click Import.
- Upload a CSV file. Use Download sample CSV to get the correct format.
- Plane validates and processes the file, then shows a summary.
CSV format
The file has three columns:
| Column | Required | Notes |
|---|---|---|
name | Yes | The label name. Blank names are reported as errors. |
description | No | Stored on the label. |
color | No | A hex color such as #0693E3. Invalid or blank colors get a random color assigned. |
What the import does
- Creates new labels only. It never updates or links to existing labels.
- Skips duplicates. A row whose name already exists in the project (case-insensitive), or repeats a name from earlier in the same file, is skipped rather than merged or renamed.
- Does not create groups. Imported labels are flat; parent/child grouping is not carried by the CSV. You can group them afterward by drag-and-drop.
- Runs in the background and reports a summary of how many labels were Created, Skipped, and Failed. If any rows failed, you can download an error report showing which rows and why.
Things to know
- A label belongs to one project. To use the same taxonomy in another project, recreate the labels there, import them from a CSV, or start the project from a template that includes them.
- The app shows name and color only. A
descriptionfield exists and can be set through the CSV import and the API, but it is not shown or editable in the app today. - No limits are enforced on how many labels a project can have or how many labels a single work item can carry.
- Reusing a deleted label's name is allowed. Once a label is deleted, its name is free to use again.